Introduction
When it comes to improving your https://parapetfencing.com.au/colorbond-fencing/ property's aesthetic appeal and security, couple of alternatives are as effective and trendy as installing a Colorbond fence. Understood for its durability, low-maintenance requirements, and smooth look, a Colorbond steel fence can transform any outdoor space into a sanctuary of privacy and style. But how do you take on such a project on your own? Worry not! In this extensive guide, we'll explore the DIY pointers and tricks for successfully installing a Colorbond fence, guaranteeing you accomplish professional-looking outcomes without breaking the bank.
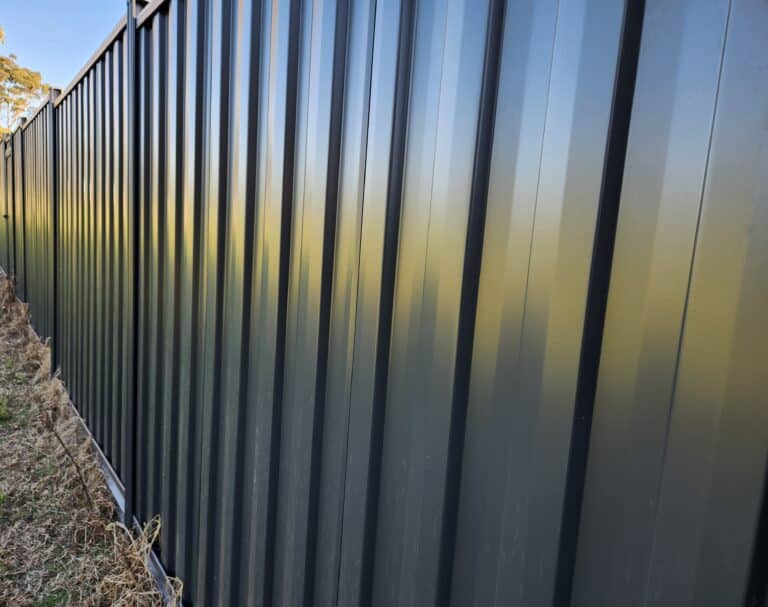
What is a Colorbond Fence?
Before jumping into the basics of installation, let's clarify exactly what a Colorbond fence is. Basically, it's a kind of fencing made from high-quality steel that has actually been coated with a long lasting paint surface. This special finish not just offers an appealing look however likewise provides substantial defense against the elements.
Why Select Colorbond Fencing?
- Durability: Unlike standard wooden fences that can warp or rot with time, Colorbond steel fences stand strong versus extreme weather condition conditions. Aesthetic Appeal: They come in different colors and designs to match every home's exterior. Low Maintenance: No need for routine painting or staining; all you need is an occasional wash. Security: Their robust building and construction makes them really secure.
Planning Your Colorbond Fence Installation
Assessing Your Residential or commercial property Needs
Before you start acquiring products or tools, it's essential to examine your residential or commercial property needs carefully. Consider the following:
- What purpose will your fence serve? (Personal privacy, security, limit marking) What height do you desire for your fence? Are there any local guidelines relating to fencing?
Understanding Local Regulations
Check with your local council about zoning laws and fencing guidelines. Some locations might have particular standards relating to height limitations or material types. Understanding these rules upfront can conserve you time and money later on.
Choosing the Right Design
Colorbond fences can be found in various styles:
Flat Top Picket Style Lattice Top Scalloped DesignSelecting the best style will depend on both functionality and individual preference.
Materials Required for Installation
Essential Tools
To install your Colorbond fence efficiently, you'll require some necessary tools:
|Tool|Purpose|| ------------------------|----------------------------------|| Post Hole Digger|Digging holes for posts|| Level|Making sure posts are straight|| Measuring Tape|Measuring ranges precisely|| Hammer|Driving in nails/fasteners|| Power Drill|For screws and hardware|
Materials Required
You'll also need particular materials:
- Colorbond panels Fence posts Concrete mix (for securing posts) Fasteners (screws/nails)
Consider visiting local providers for accurate measurements worrying how many panels you'll need based on your lawn's dimensions.
Preparing Your Website for Installation
Clearing the Area
Before you start installation, clear the area where the fence will go. Remove any particles like rocks or plants that might obstruct construction.
Marking Out Your Fence Line
Use stakes or spray paint to define where the fence will sit. This step is essential as it guides where each post will be placed.
Measuring Distances Between Posts
Typically, posts ought to be spaced 2.4 meters apart depending upon regional regulations and style preferences. Ensure accuracy here to avoid misalignment later!
Installing the Posts for Your Colorbond Fence
Digging Post Holes
Using your post hole digger, begin digging holes a minimum of 600mm deep to offer stability for each post.
Setting Posts in Concrete
Once you have actually placed your posts in their particular holes:
Pour concrete mix around each post. Use a level to guarantee they're straight. Allow concrete to treat according to maker directions before proceeding.Attaching Panels to Posts
Aligning Panels Properly
Once your posts are established safely, begin attaching panels starting from one end:
Align the very first panel with the top of your posts. Secure using fasteners or screws according to instructions provided with your panels.Ensuring Consistent Height Throughout Panels
Consistency is essential! Procedure regularly so that all panels align completely along their tops.
Adding Finishing Touches to Your Fence Installation
Trimming Excess Panel Lengths (if essential)
If you've chosen longer panels than essential or if they surpass desired heights, use metal cutters to trim excess lengths carefully.
Painting or Finishing (Optional)
Although Colorbond fences come pre-finished in different colors, if you've done any cutting or adjustments that expose raw edges, consider applying touch-up paint for included security against corrosion.
Maintenance Tips for Your New Colorbond Fence
Regular Cleaning up Routine
Every few months, give the panels a gentle wash with soap and water using a soft sponge.
Inspecting for Damage or Wear Over Time
Make it a routine to examine routinely for signs of rust or damage-- attending to problems right away can prolong its life-span significantly!
FAQs About Setting up a Colorbond Fence
1. What tools do I need for installing a Colorbond fence?
You'll mainly need fundamental hand tools like hammers and drills together with specialized ones such as post hole diggers.
2. How deep should I dig my post holes?
Generally speaking, go for a minimum of 600mm deep per local building regulations unless otherwise defined by regulations in your area.
3. Can I set up a Colorbond fence alone?
Yes! While it may take longer without support due to lifting heavy panels ... It's certainly possible!
4. Exists any maintenance required after installation?
Not much! Simply regular cleaning now and then will be sufficient; check regularly for rust indications too!
5. Exist color options available?
Absolutely! One terrific function of using these types of fences is their variety of offered colors; select what fits best with your home's style!
6. The length of time does it take to set up one section?
Depending on experience level & & size ... expect anywhere from several hours up till an entire weekend if you're working solo!
Conclusion
Installing a Colorbond fence can be an incredibly rewarding task that boosts both personal privacy and curb appeal while guaranteeing resilience in time! With correct preparation-- understanding regional guidelines-- collecting necessary tools/materials-- and following these actions vigilantly-- you'll discover yourself enjoying this gorgeous addition earlier than expected! Keep in mind: maintaining consistency throughout positioning & & regular cleansing regimens later guarantees longevity too-- so get out there & & make those enhancements take place today!
By following this guide entitled "Installing a Colorbond Fence: DIY Advice," you're well-equipped with all vital understanding required before diving into this exciting endeavor!